
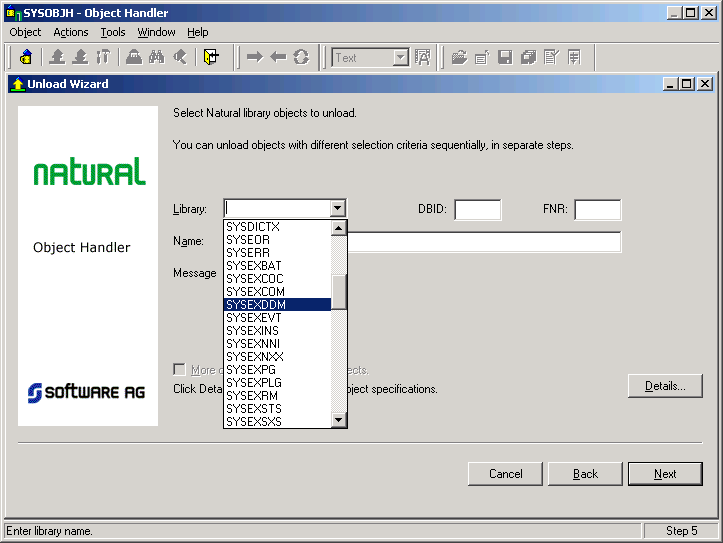
 button. If you also enter a specific DBID and/or FNR, only the relevant DDMs are selected, otherwise all valid DDMs are returned.
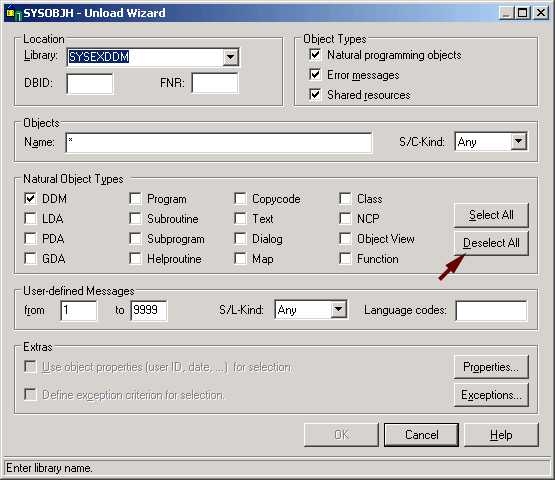
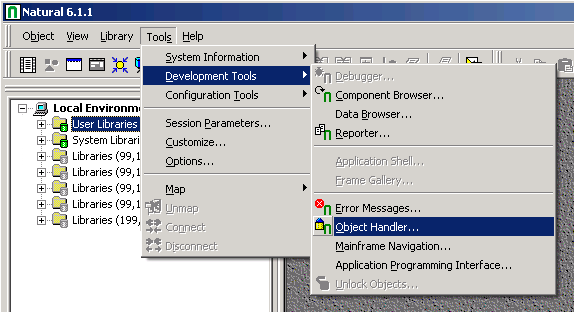
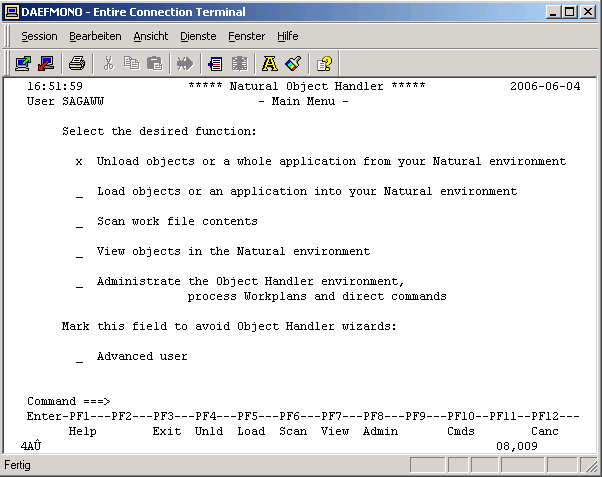
- Start Natural, enter the command SYSOBJH to start the Natural Object Handler.
-
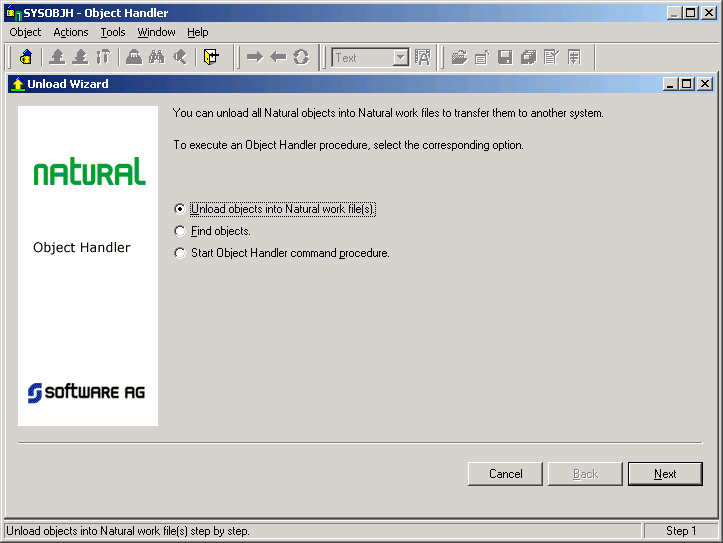
Select the Unload fnuction to start the Unload Wizard.
-
Check Unload objects into Natural work file(s) radio button.

-
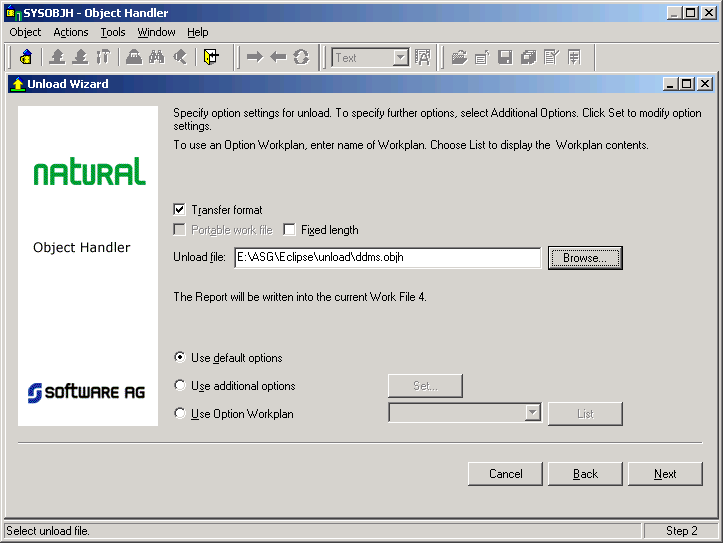
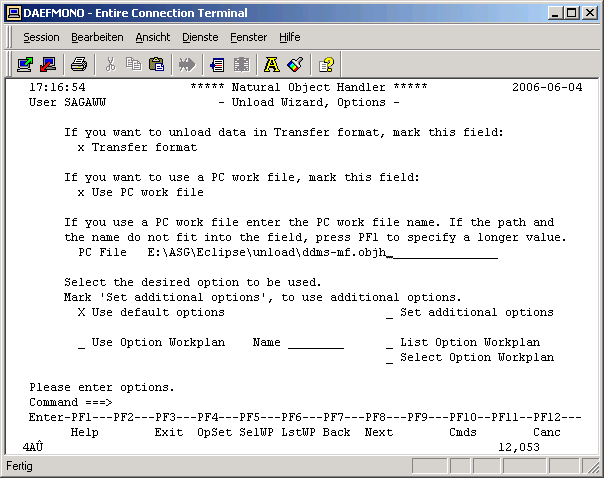
Select Transfer format, this example uses Entire Connection to transfer the unload file to your PC, enter the location to which you want the files to be unloaded in the PC File input field.
-
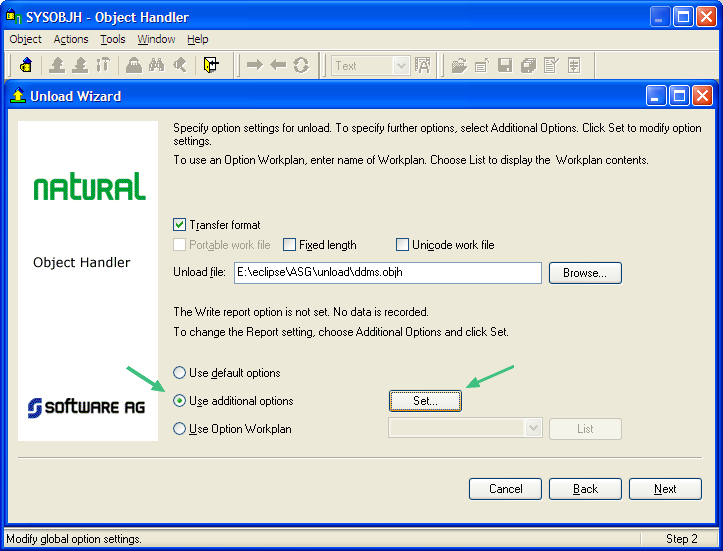
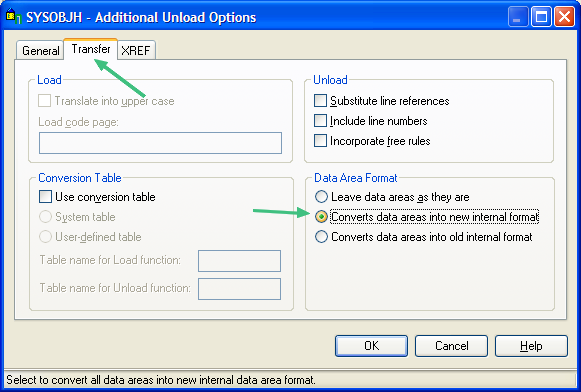
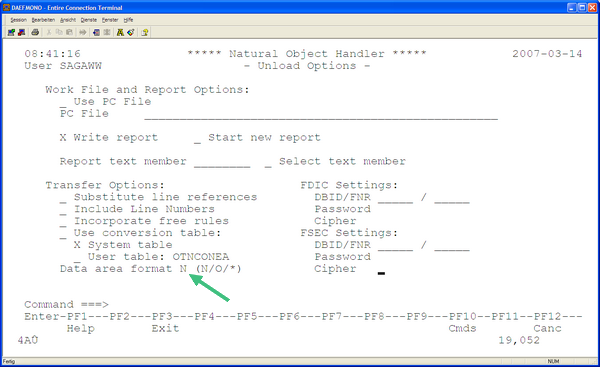
When generating an OBJH extract including PDAs, it is essential to set the following:
-
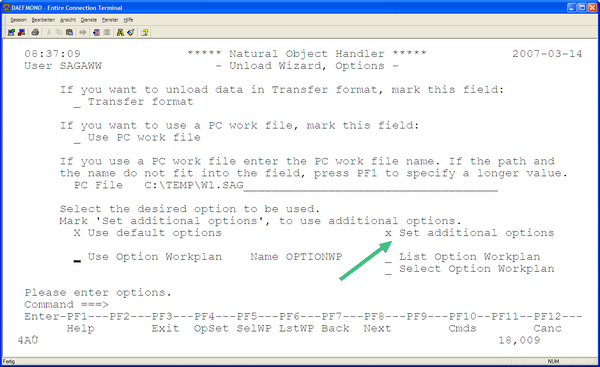
Check "Set additional options" and press <ENTER>
-
Enter a "N" into the "Data area format", then press "ENTER"
-
-
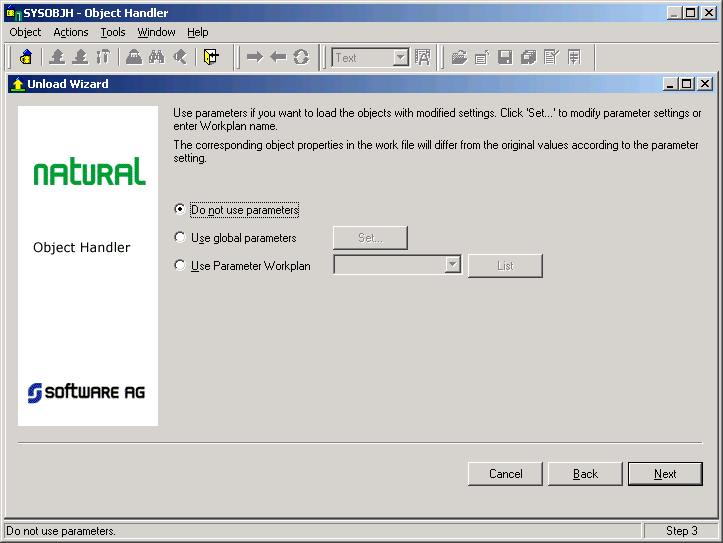
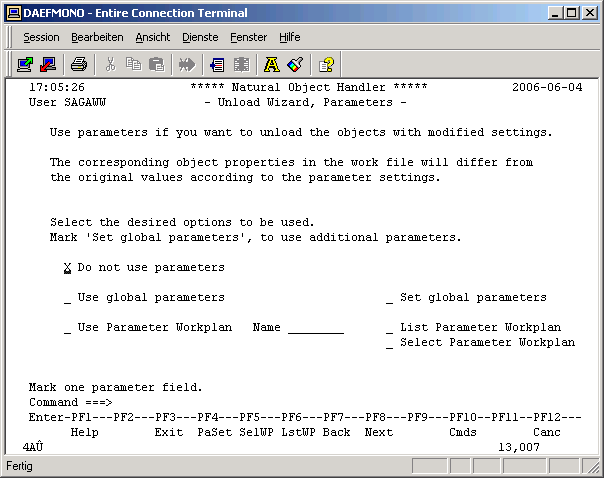
Select Do not use parameters.
-
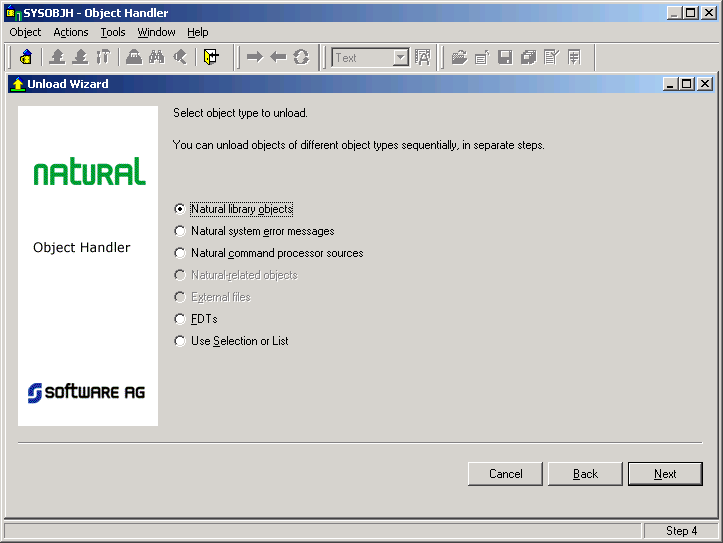
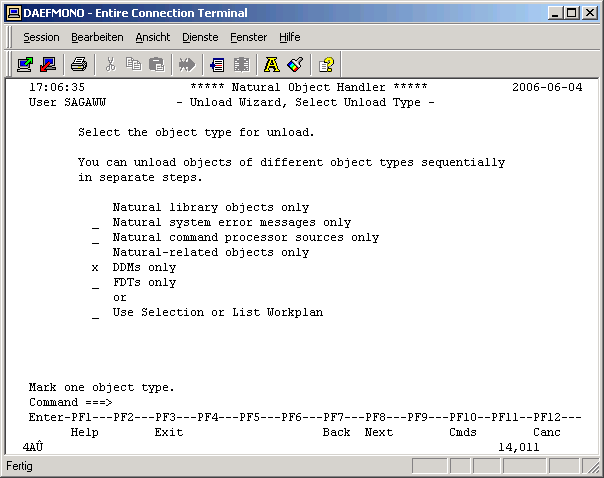
Select DDMs only.
-
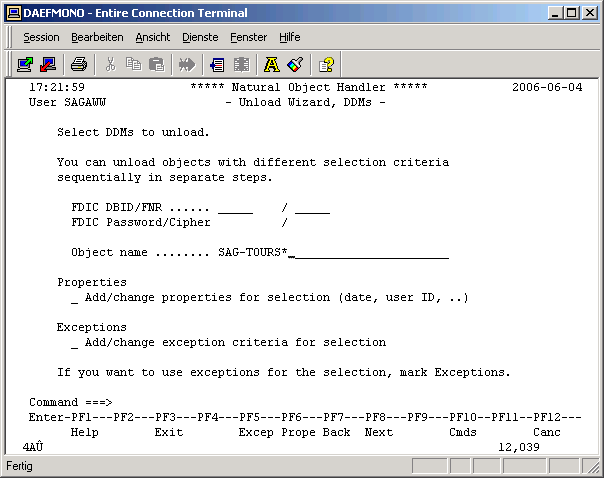
Select the DDM(s) to be unloaded, optionally specify additional selection criteria to narrow the search.
-
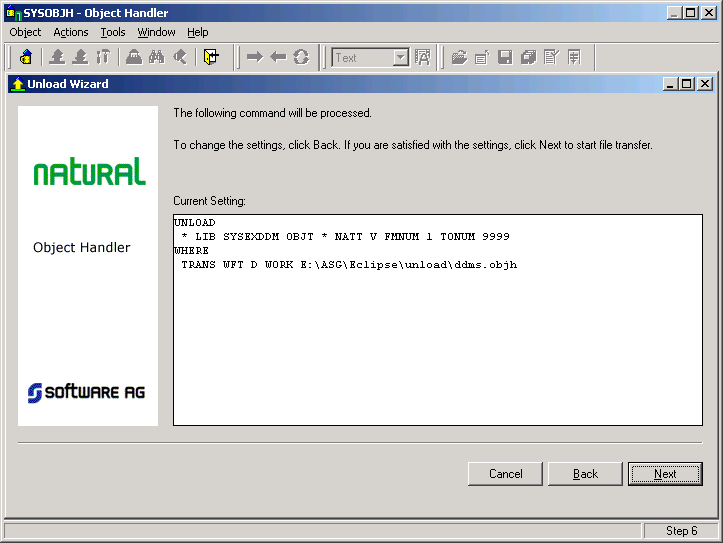
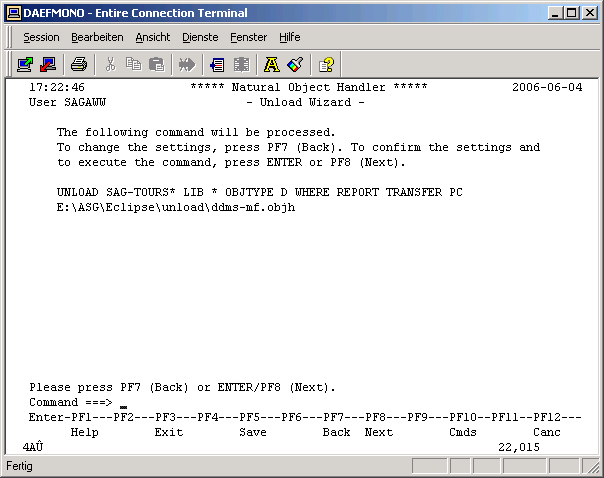
The generated Unload command is shown. Hit the Enter or PF8 key to start the actual unload process.
-
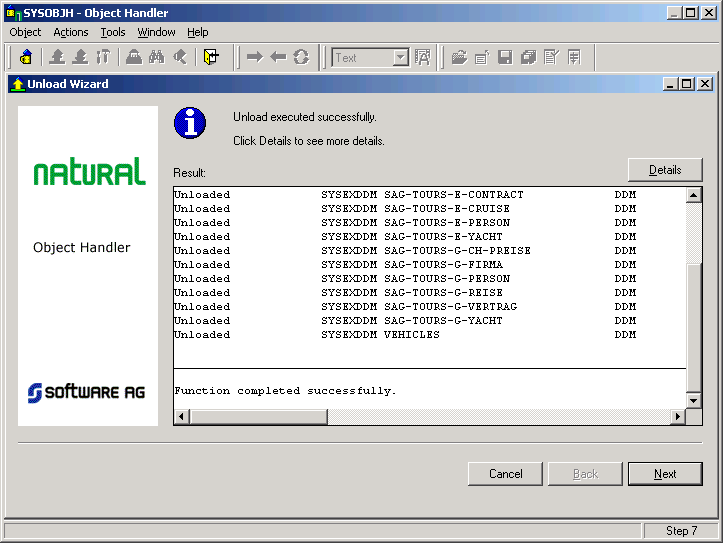
The status of the unload is shown. If it was successful, a file is created under the path and file name specified. Hit the Enter key to complete the unload, terminate the SYSOBJH wizard.

| |
||
| PDF BOOKS | HOME UP PREV NEXT | ||