| |
||
| PDF BOOKS | HOME UP PREV NEXT | ||
If you are new to Eclipse, please take the time to go through this introduction, and familiarize yourself with the basics of the Eclipse framework.
If you have worked with Eclipse before, you may skip this section.
Running Eclipse is as easy as launching the Eclipse executable - "eclipse" on Linux / Unix platforms, "eclipse.exe" on Windows - in the top-level Eclipse directory.
In case you are new to Eclipse and run into problems, try the Eclipse FAQs.
When the Eclipse Workbench is launched, the first thing you see is a dialog that allows you to select where the workspace should be located. The workspace is the directory where your work will be stored. When you start Eclipse for the very first time after installation, Eclipse will propose a workspace named "workspace" located in your "home" directory (depending on the operating system you are running Eclipse on). Either just click OK to pick the default location, or specify a path + filename of your choice, then click OK. (You can also check the checkbox to prevent this question from being asked again.)

After the workspace location is chosen, the Eclipse Welcome Screen will be shown. You may want to start by going through some of the introductory tutorials offered by Eclipse, or just commence to the Workbench by clicking the bent arrow in the top right corner.

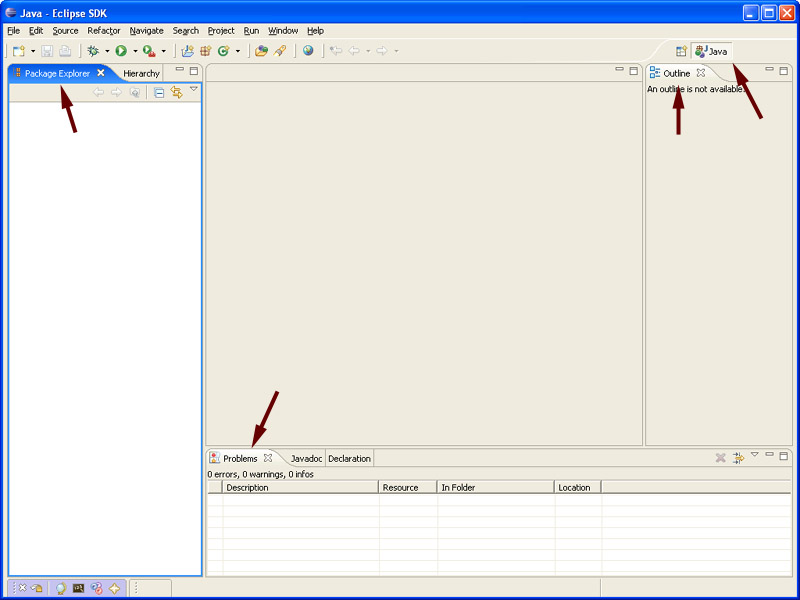
A single Workbench window is displayed. A Workbench window offers one or more perspectives. A perspective contains editors and views, such as the Package Explorer. Multiple Workbench windows can be opened simultaneously. Initially, in the first Workbench window that is opened, the Java perspective is displayed.
(You can get the Welcome view back at any time by selecting Help > Welcome.)
A shortcut bar appears in the top right corner of the window. This allows the user to open new perspectives and switch between ones already open. The name of the active perspective is shown in the title of the window and its item in the shortcut bar is highlighted.
The title bar of the Workbench window indicates which perspective is active. In this example, the Java perspective is in use. The Package Explorer, Problems, and Outline views are open along with an editor. The "editor" view is the one in the center of the screen and is currently "empty" because no resources have been opened for editing so far.
A Workbench consists of:
a group of views and editors in the Workbench window.
One or more perspectives can exist in a single Workbench window, each perspective contains one or more views and editors. Within a window, each perspective may have a different set of views but all perspectives share the same set of editors.
a visual component within the Workbench.
Typically used to navigate a hierarchy of information (e.g. the resources in the Workbench), open editors, or display properties for the active editor. Modifications made in a view are saved immediately. Only one instance of a particular type of view may exist within a Workbench window.
also a visual Workbench-component.
Used to edit or browse resources. Modifications made in an editor are only saved when explicitely requested. Multiple instances of an editor type may exist within a Workbench window concurrently.
as views and editors have a number of features in common, the term part is used to mean either a view or an editor.
Parts can be active or inactive, but only one can be active at any one time. The active part is indicated by a highlighted title bar and is the target for common operations like cut & paste.
New resources (e.g. projects, folders, files) can be created using several different approaches:
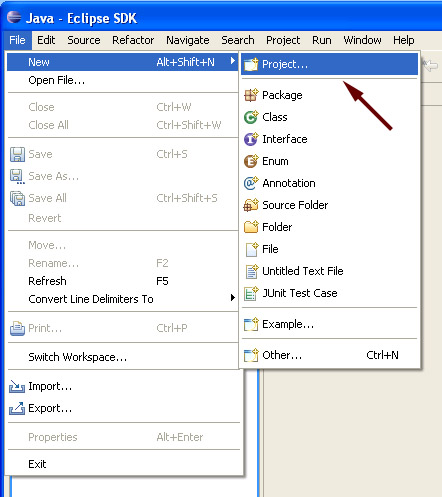
First of all, a project must be created using the File menu.
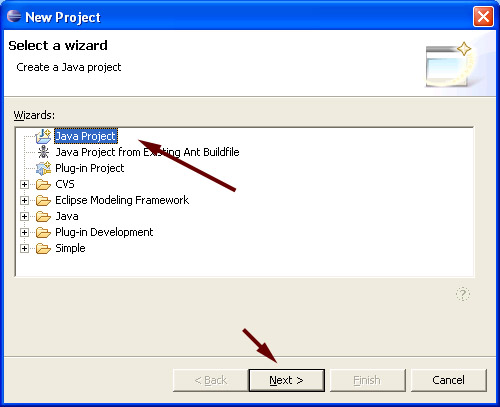
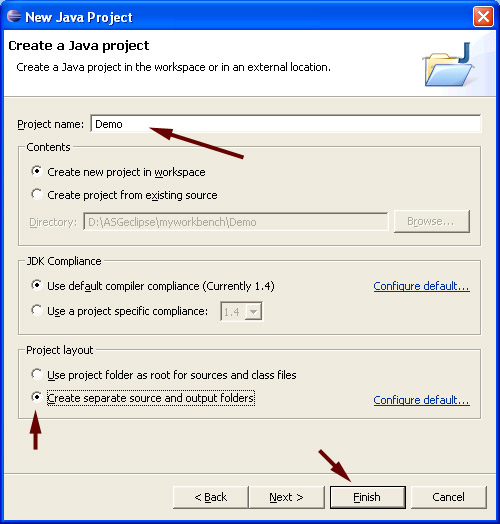
The "New Project Wizard" appears, select Java Project and click Next.
Enter a Project name, make sure to check the Create separate source and output folders selection, click Finish to create the project.
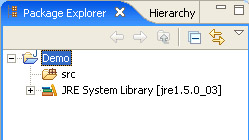
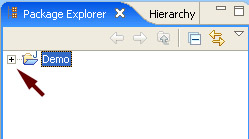
The Package Explorer now shows the project folder you just created, the "+" icon to the left of the project name indicates the folder is not empty, so click the "+" sign to see what's there.
The New (Java) Project Wizard did the following: