| |
||
| PDF BOOKS | HOME UP PREV NEXT | ||
With a service description (WSDL), a proxy class can be created with the .NET Framework SDK Wsdl.exe tool.
A XML Web service client can then invoke methods of the proxy class, which communicate with Portus over the network by processing the SOAP messages sent to and from Portus server. The proxy class handles the work of mapping parameters to XML elements and then sending the SOAP message over the network.
Wsdl.exe can be used to create proxies for C#, Visual Basic .NET and JScript .NET, for the purpose, we will be generating C#.
Wsdl.exe is a Microsoft .NET tool which is used to create proxies for C#, Visual Basic .NET and JScript .NET. In this tutorial, we will be generating C#.
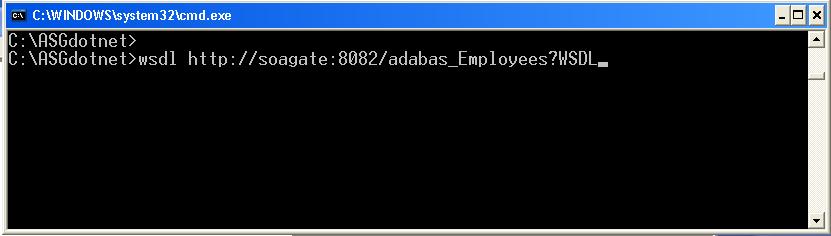
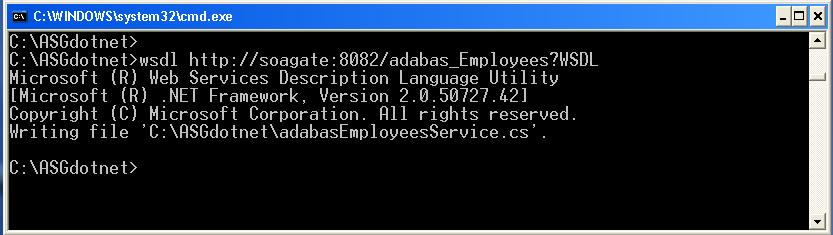
From a command prompt, execute Wsdl.exe, specifying the URL / URI of the Portus DataSource to be exposed, append ?WSDL to instruct the Portus server to return the WSDL, not data:
If the Wsdl.exe is not found, open the Visual Studio command prompt via the Start Menu. This location depends on what packages are installed, but often resides under "Microsoft Visual C# " or "Microsoft .NET Framework SDK ".
A single source file is generated, its name is <rootElementName>Service.cs, in this case the "root element" within the XSD is "adabasEmployees", thus the name of the proxy class source file adabasEmployeesService.cs
This file contains a proxy class exposing both synchronous and asynchronous methods for each Web Service operation provided by Portus.
For instance, for the list operation, the proxy class has the following methods: list, Beginlist, and Endlist. The list method of the proxy class is used to communicate with Portus synchronously, but the Beginlist and Endlist methods are used to communicate with a Portus server asynchronously. For more information about asynchronous communication with a Web Service please refer to the .NET documentation.
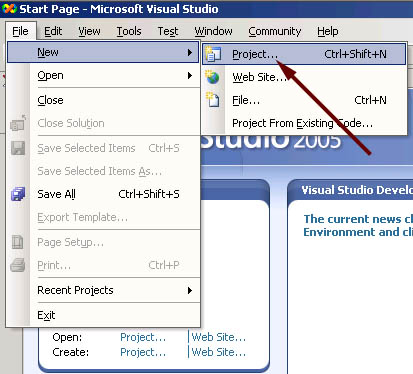
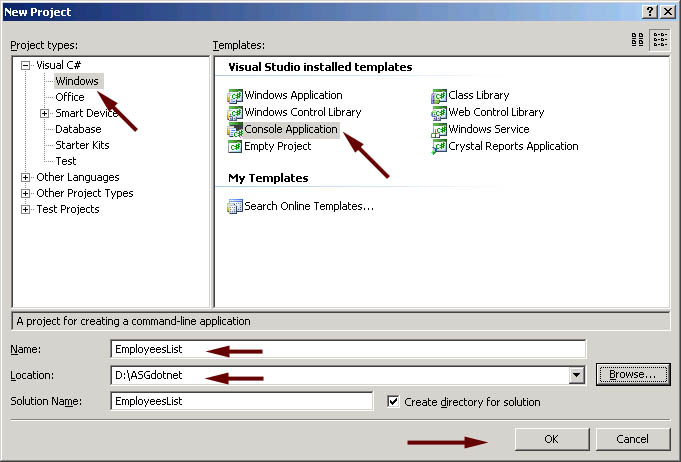
Start MS Visual Studio, create a new project with File -> New - Project (or the shortcut Ctrl+Shift+N):
Create a C# Console Application, assign a name to it, specify the storage location, click OK
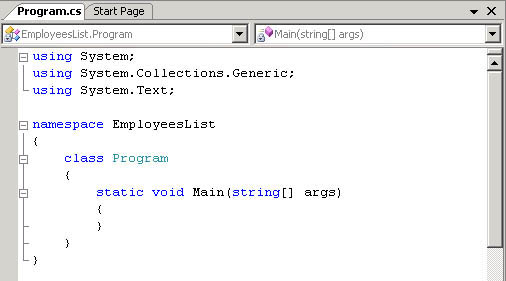
A skeleton class file has been generated into your project workspace, with the required class definition and an empty Main method
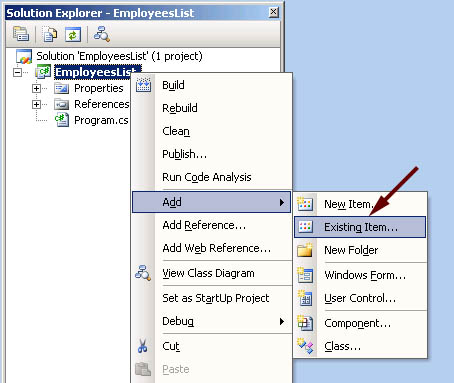
First of all, import the generated proxy into the project, right-click on the project name, select Add -> Existing Item
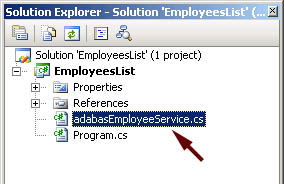
select the AdabasEmployeeService.cs proxy, click Add
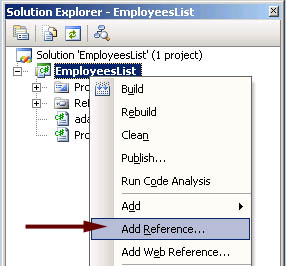
You now need to add a reference to the .NET System.Web.Services component implementing the SOAP interface. In the project explorer, right click on the project name, select Add Reference
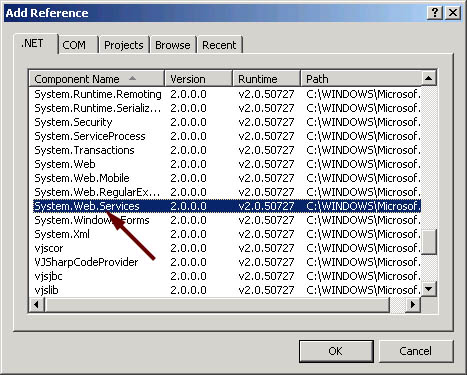
Scroll down to System.Web.Services, click to select it, click to select it, click OK to import the reference
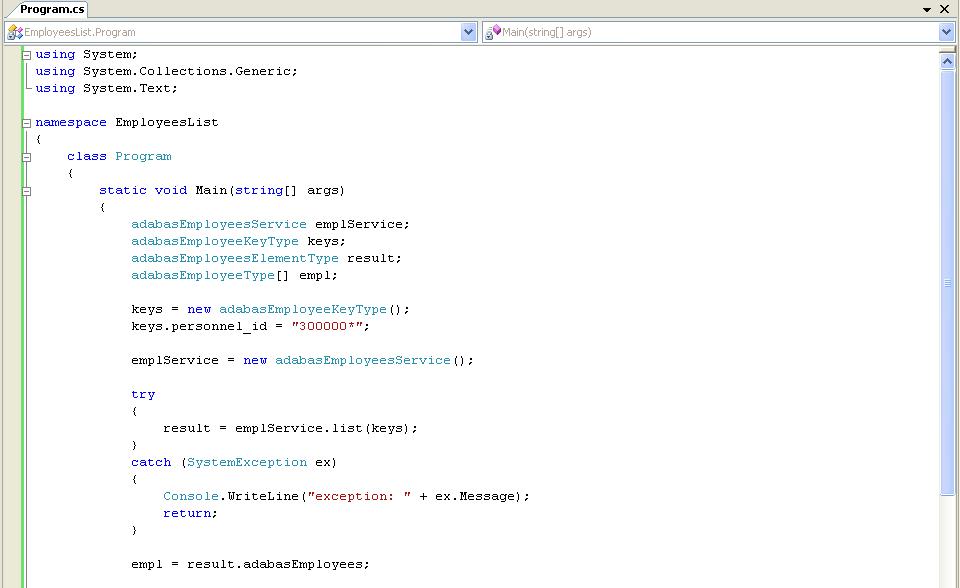
Remove the generated code from the newly added class entirely, use (paste) the code from ASGDemo.cs to create your first test program accessing Adabas data via Portus.
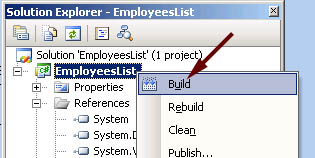
Build the application. Right-click on the project name in the project explorer, click Build
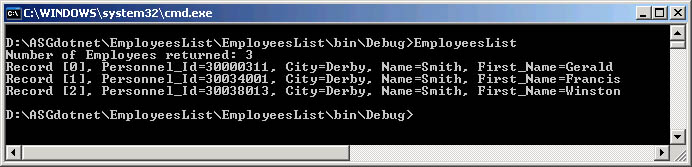
Open a command window, change to the project's build-directory Execute the compiled console application, EmployeesList, the output will look as follows:
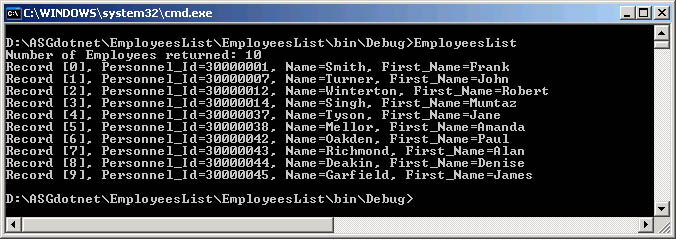
This sample selects all "Employees" records with a personnel-id of 4000004n, you may want to experiment varying the key data, this is easily done by modifying the properties passed to the generated classes. E.g. try the following to list all records for "Employees" whose names start "SMI", living in cities with names starting "D".
keys.name = "SMI*";
keys.city = "D*;
The output will look like this: