| |
||
| PDF BOOKS | HOME UP PREV NEXT | ||
Enter or select a Destination folder, specify a name for the DataView file, click Finish to create it.
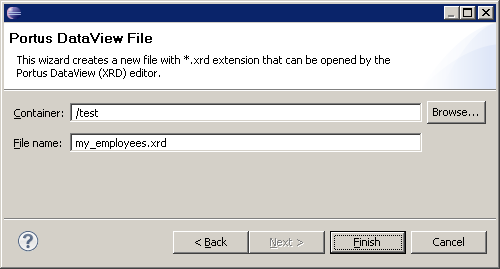
You have now created an "empty" (i.e. no fields defined yet) Portus DataView file in the selected folder.
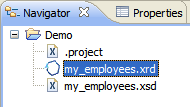
by double-clicking on it's name in the Package Explorer or Navigator
by right-clicking the DataView (.xrd) file, Open With -> Portus Resource Definition Editor

Open a "remote" DataView file, directly on the server, without importing it into a workspace / project first, by right-clicking the DataView name in the Configuration View to bring up the context menu, then select "edit DataView"

For the purpose we will open an empty DataView file and populate it with all information required to be able to start issuing requests against an Adabas Resource (= Adabas file on an Adabas database). This tutorial will be based on the Adabas "Employees" demo file.
DataViews are not tied to a specific "resource type", the same mapping can be used to access an Adabas file or a SQL table. There are, however, elements of a DataView which are only meaningful in the context of a specific resource type, for example "special descriptors" (super-, sub-, ...) for Adabas.
The display areas relevant for editing the DataView file are
In case the "Properties" view somehow got hidden, right-click into the edit window and select "Show Properties View" from the context menu.
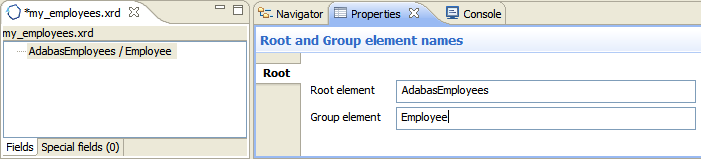
The result should look like this:
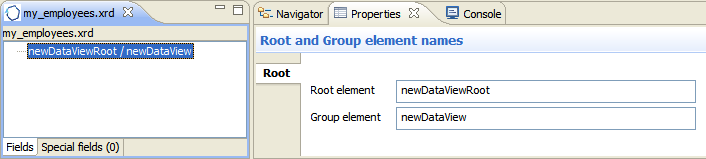
First of all, enter the Root element name: The (XML) "structure" or "set" name under which items (records) for a Resource linked to this DataView will be referred to. E.g.: AdabasEmployees
Enter the Group element name, this is the Portus "record name". (E.g.: Employee).
Changes applied to name fields in the Properties view are reflected in the editor's tree view immediately.
A new element ("Field") has been added with all properties set to initial values.
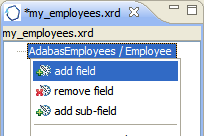
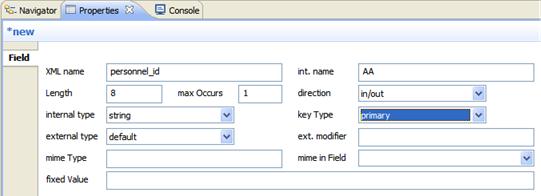
The first field we are going to add is the "personnel Id", set the properties as follows:
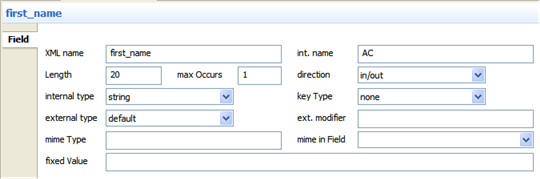
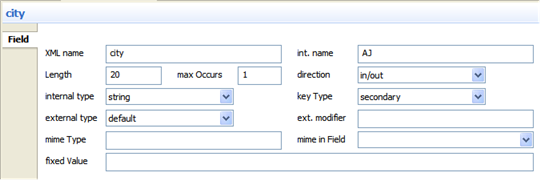
Add a few more fields with the following attributes:

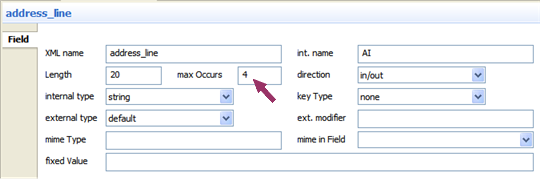
Next we are going to define the "address line" field, which is a MU (multiple value) field. MU fields are defined like a "flat" field, with the exception of the max Occurs Property being set to a value >0
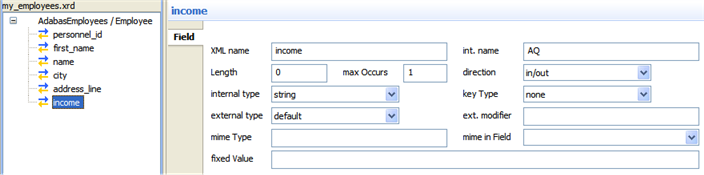
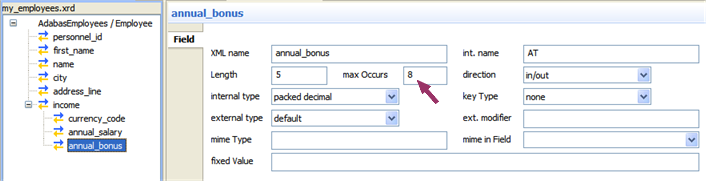
So we first add the "group field" income. Only the xml Name, int. name (internal name = Adabas field name) and max Occurs properties are relevant here.
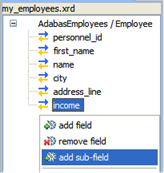
To actually turn the income field to a PE group field, right-click it, select add subfield
PE Sub Field properties are equivalent to those of "regular" fields. Define the three PE-fields as follows:
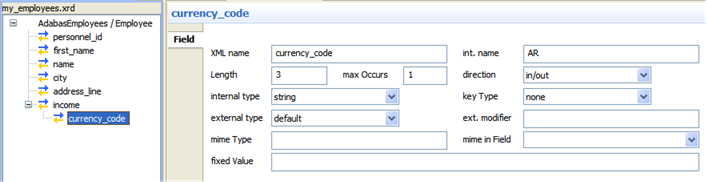
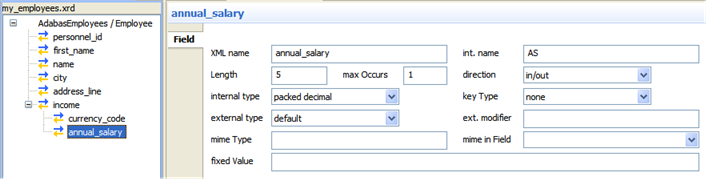
max Occurs >0 on the PE-field level denotes a MU within a PE.
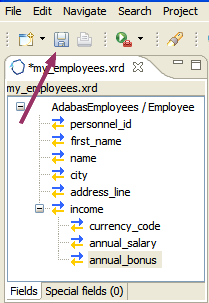
The "view" to the "Employees" file is now complete. Save the DataView by selecting the Save button or Ctrl+S.
The following "special" fields can be defined for a DataView
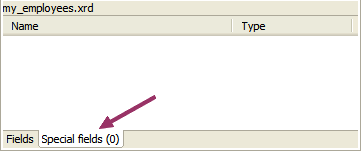
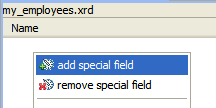
In the DataView editor window, click on the "Special fields" tab to add special fields
Right-click into the empty editor area, select "add special field"
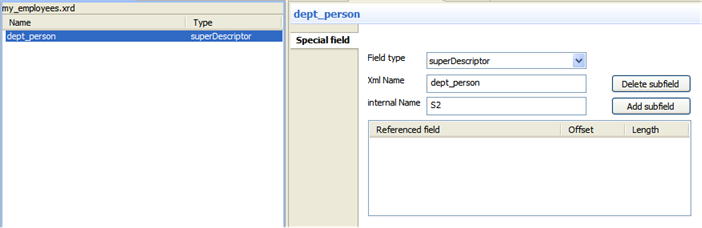
For example we define a special field called "dept_person" with an "internal name" (the Adabas short name) of "S2", being of type "superDescriptor"
Click on the "Add subfield" button, a new field element will appear in the subfield table
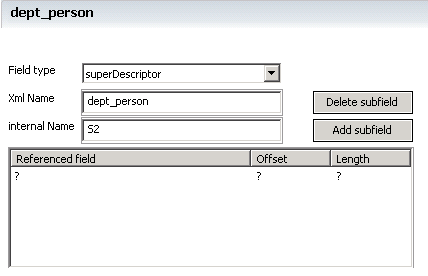
Click on the field value under the "Referenced field" heading, select the field to be added from the list of fields in the dropdown-box. Here we select the "dept" field

Initial "Offset" and "Length" values will be derieved from the selected field's definition
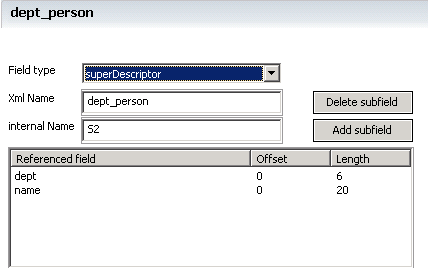
Select the "name" field as the second subfield just like the "dept" field, the result should look like this
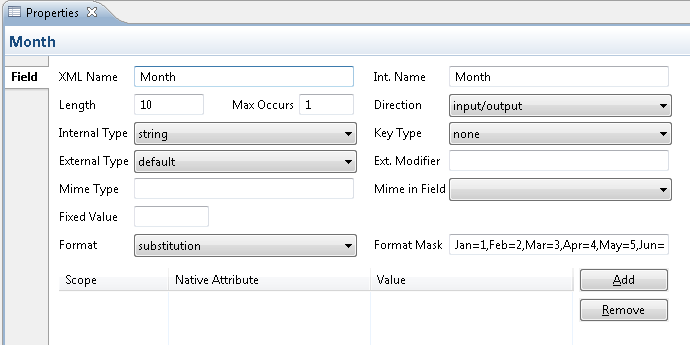
This facility allows the conversion of a string value to an integer equivalent and vice versa. This is analogous to an enumeration i.e. for Jan substitute 1, Feb substitute 2 etc.
In the DataView editor window, select the field.
In the Properties View 2 items need to be changed
Set the Format Mask field to the value of the enumeration string. This should be in the format strvalue1=num1, strvalue=num2, strvalue3=num3 e.g.
Jan=1,Feb=2,Mar=3,Apr=4,May=5,Jun=6,Jul=7,Aug=8,Sep=9,Oct=10,Nov=11,Dec=12
To save select Ctrl+S or close the DataView editor.
Right-click on the Service and select 'Refresh Service'.
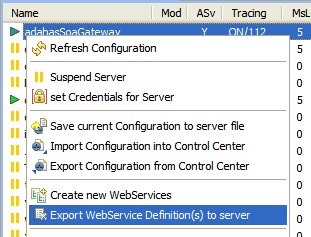
Whether you created a new one or imported and edited an existing DataView, you will now need to export it to the Portus server. DataViews are stored in the "xrd" subdirectory of the server configuration directory.
To export a Portus DataView to a Portus server execute one of the the following procedures:
Select Export Resource Definitions from the context menu of the server you wish to export to.
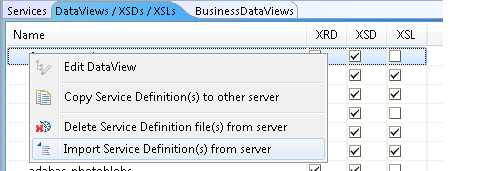
To import an existing DataView:
From the Portus Configuration View's "DataViews / ..." tab, select the elements and right click. Select "Import Service Definition(s) from server"
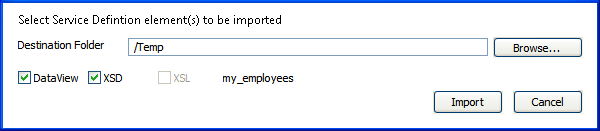
Select the destination folder and click "Import"
An XML Schema ( XSD) can be used to express a schema: a set of rules to which an XML document must conform in order to be considered 'valid' according to that schema. In Portus an XML Schema can be used to validate the input coming from the user. This validation occurs at a very early stage of the processing, so this can be a useful method of enforcing data rules in Portus in a fast and efficient manner. For more information about the structure, rules and possibilities refer to the W3C XML Schema Specification
There is a one-to-one relationship between the DataView and the XML Schema. For example, if a personnel_id field is present in the DataView, the XML Schema can be used to enforce rules that this field must be an integer of at least, and not more than, 8 digits.
A XML Schema for a DataView can be created
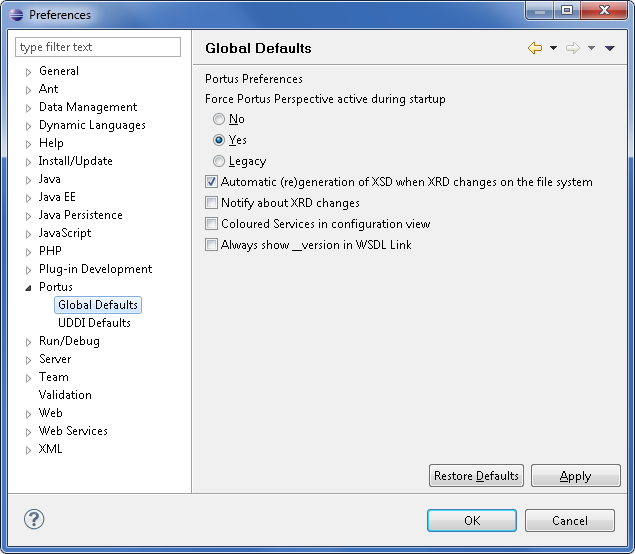
Automagically when the "Automatic (re)generation of XSD when XRD changes on the file system" preference is enabled. This option takes effect for BOTH local and remote edition of DataViews. See Window -> Preferences -> Portus -> Global Defaults.
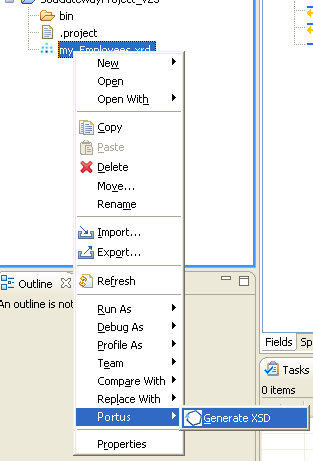
By right-clicking on the DataView in the Package Explorer.
Select Portus and then Generate XSD
You may now export this XML Schema and/or the DataView to the server.