| |
||
| PDF BOOKS | HOME UP PREV NEXT | ||
The following will guide you through the process of installing and starting the Portus server.
Using the Deployment Wizard for Linux/Unix type systems
Server Installation
In preparation of running the Portus server on the target system installation files have to be deployed to a remote maching. The deployment wizard on your Portus Control Centre on Windows or Linux can be used to deploy the required files to the target server.
If this is the first time you've started the Control Centre, the Portus Perspective will be activated automatically.
If, for some reason, the Portus Control Centre perspective has not started, click Window -> Open Perspective -> Other and choose Portus Control Centre from the list. Click OK
You will be asked to specify a project name or accept the default. Usually you will now simply click the 'Continue' button, which will then start the 'Deployment Wizard' to guide you through the process of defining your server within the Portus Control Centee and transfer (FTP) the installation files to the Portus Server target machine.
If you, for whatever reason, opt to NOT run the Deployment Wizard at that time, you can start the wizard anytime later on by clicking the Deployment action button in the title bar of the Portus View
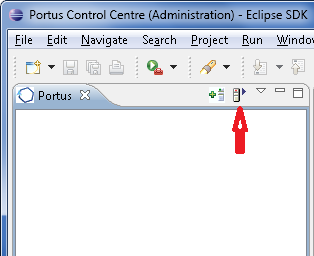
The Deployment Wizard will appear
Click "Browse" to select your license, choose your server installation kit from the list of available and licensed kits.
Click Next
The following screen allows you to either select an existing Portus server to deploy to, or to define a new Portus server to the Control Center. This server definition will be used for server administration later on.
To define a new server
The server will now be added to your Portus Control Center Portus View' for later use.
Select the transport mechanism, one of
Click Next
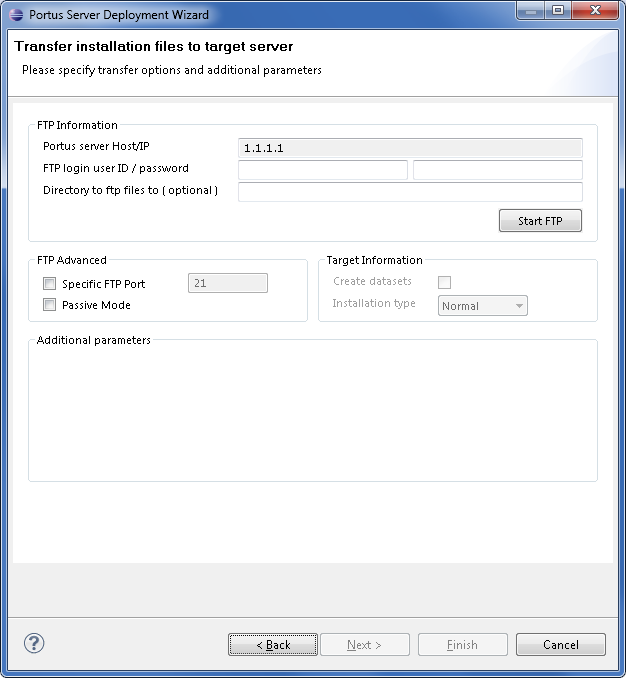
The next screen is used to deploy the installation files to the target machine, i.e. the machine is where the Portus server will run. Which of the following paths will be taken depends on the choice made regarding the transport mechanism above.
FTP
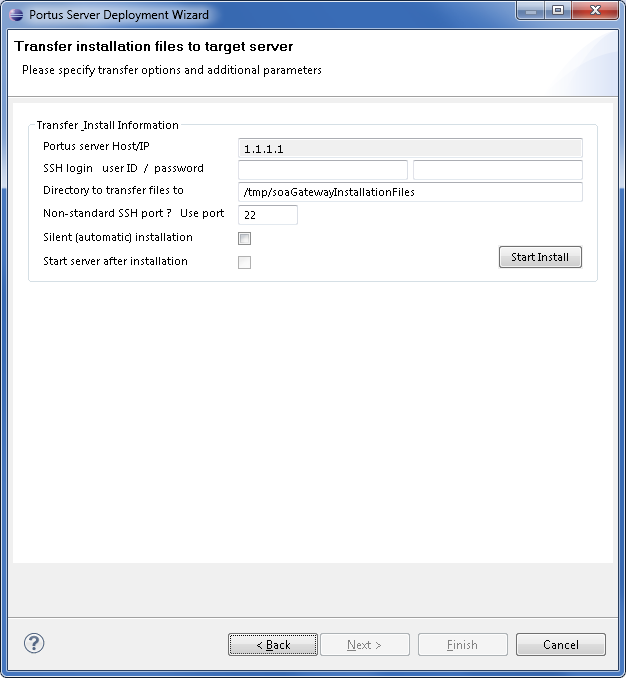
SSH
Once you have started the transfer you will prompted for your confirmation that it is really the host you want to send the files to.
If you want the Deployment Wizard to also schedule the actual installation remotely, check the "Silent (automatic) installation" option, set the various directories, then click Start Install.

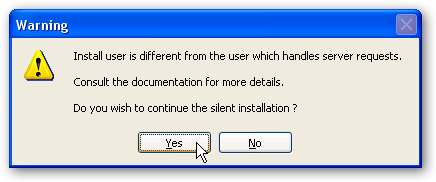
When different User IDs are specified for the "login" and "handle server requests", the following will prompt you for confirmation, please check if the authorization level for the user running the Portus server is sufficient to access and execute files created by the "login user".
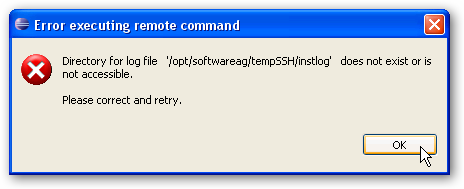
If the directory specified to contain the install log file does not exist you will be asked to create it before the installation can continue.
All other files will be created by the installation scripts.
The overall transfer status will be shown directly within the Deployment Wizard window, for larger files an external window will pop up to indicate the progress.

Run the command : ssh-keygen -t dsa
e.g.
Generating
public/private dsa key pair. Enter file in which to save the key
(/home/myUser/.ssh/id_dsa): Enter passphrase (empty for no passphrase): Enter
same passphrase again: Your identification has been saved in
/home/myUser/.ssh/id_dsa. Your public key has been saved in
/home/myUser/.ssh/id_dsa.pub. The key fingerprint is:
7d:a9:f9:44:31:c3:d8:6c:d8:c1:d0:5f:39:f8:75:79 myUser@192.168.135.51
Copy your public key to the remote server
e.g.
>> scp .ssh/id_dsa.pub
myUser@192.168.135.99:.ssh/ Password: id_dsa.pub 100% 600 0.6KB/s
00:00
Login to the remove server and add your public key to the authorized keys.
e.g.
myUser@192.168.135.51:~> ssh -l myUser
192.168.135.99 Password: Last login: Tue Sep 29 17:02:47 2009 from
v-br.vpn.risaris >> cd .ssh/ >> cat id_dsa.pub >>
authorized_keys2
You should now be able to login to the remote server without a password.
In the case of problems, SSH information will appear in /var/log/messsages or /var/log/lastlog
Now that the server has been installed, you can query the server status from the Deployment Wizard.
You can choose to view this status information in the Deployment Wizard, in a browser, or both.
You should now click Configure Driver(s) to create Portus drivers that are enabled in your license. If you choose to not add drivers now, they can also be created at a later stage, more information about defining drivers can be found in the Portus View section of this documentation.
The "Driver Wizard" will present a list of licensed drivers, and come up with all drivers selected and ready to be defined. You may now just click the Configure button to define all of them, or deselect those you do not need or want to set up at that stage.
Click "Configure".
In case the driver does not require any additional parameters to be set, it will be defined now, otherwise the Driver Definition Dialog will ask for the additional parameter(s) to be set. e.g. for an Adabas driver set the "ListMaxRecords" parameter. Click the Save button.
This section outlines machine specific installation steps.
On the target machine, in the installation directory, execute the script ./installServer.sh.
If required, specify the Software AG sagenv file that is to be used (an absolute path must be used). Example: /opt/softwareag/sagenv.new