| |
||
| PDF BOOKS | HOME UP PREV NEXT | ||
The Service creation process can be started by selecting the appropriate driver, right-clicking and selecting either Discover Service(s) or Add Service:
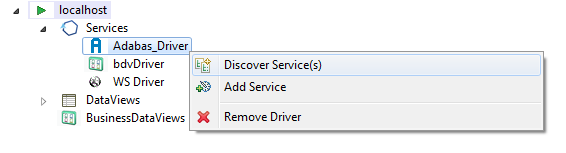
Discover Service(s) will start the discovery wizard and request the specific parameters required for the selected driver type.
Add Service will ask you to name the service and you can then manually set the various parameters as per your particular system.
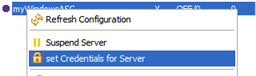
It may be required to provide login credentials, for example when accessing a SQL database system, this can be done from the server's context menu as well:
Specify the credentials - User ID and Password - in the SOAP Security section, click Set
Status and error information can be retrieved later on from the Portus Action Log
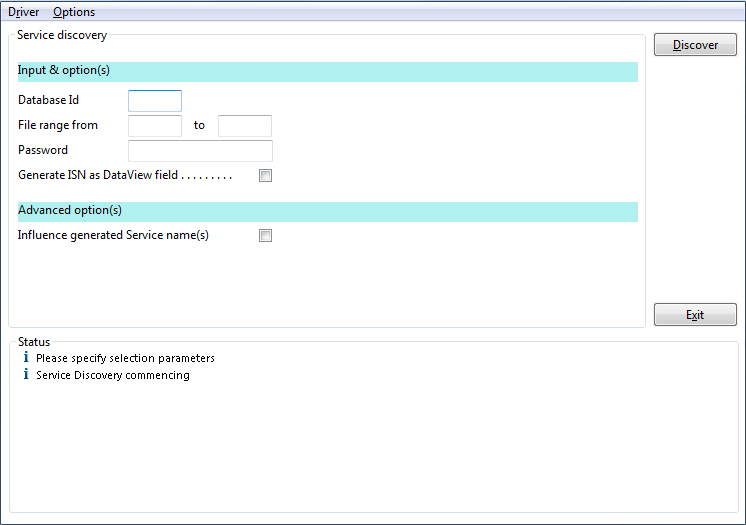
Specify the Database Id (range 1 - 255 on OpenSystems, 1 - 65535 on Mainframe platforms), plus 'File range from' and 'to' file numbers (1 - 5000) to limit the discovery to the selected range. Click the 'Discover' button:
Select the file(s) to be turned into Services, click the 'Generate >' button:

Optionally, the Service name can be modified.
The requested Services and Service definition files (DataView(s) and XSD(s)) have been added to your server configuration or, if not, a suitable error message will indicate the cause of failure.
Choose Exit to finish or Discover to generate more web services
Assumptions:
The pre-created (Business)DataView has been imported into the local workspace, and is available in the Navigator View.
If the above assumptions are OK, follow these steps:
Drag the DataView and XSD (if available) files from the Navigator View.
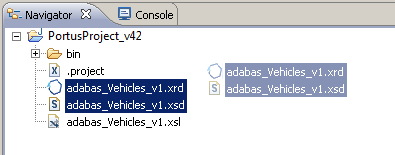
Drop the files onto the service you wish to modify
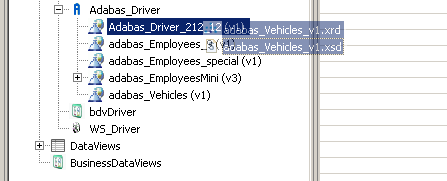
A new (Business)DataView can be assigned by dragging it from the respective Views section and drop it onto the service.
Right-click the driver and select Discover Service(s)
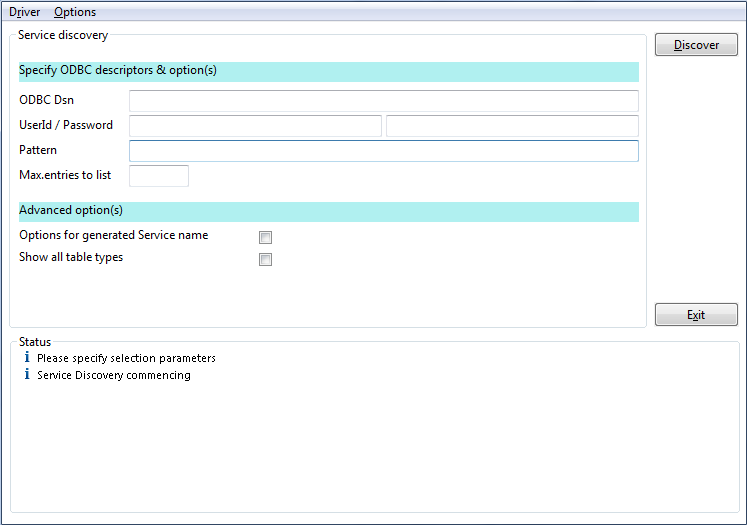
Specify the ODBC Dsn to be browsed. Optionally enter a 'Pattern' limiting the operation, for example 'c%' will return a list of tables starting with an lowercase 'c'. Another option is to specify 'Max.entries to list' to further limit the number of tables to be listed. If appropriate for your database configuration enter a UserId and Password. Click the 'Discover' button:
zOS and DB2
In the ODBC Dsn field above - enter the Location name returned from the DB2 command Display DDF
- in the example below the location name is S1D831
 COMMAND INPUT ===> /-D831 DIS DDF
RESPONSE=POC1 DSNL080I -D831 DSNLTDDF DISPLAY DDF REPORT FOLLOWS: DSNL081I
STATUS=STARTD DSNL082I LOCATION LUNAME GENERICLU DSNL083I S1D831
DEIBMIPA.IPAA77D8 -NONE .......
Also ensure that the member CLIINI in the JCL dataset has been modified as necessary. Refer to your DBA on this.
Select the table(s) to be turned into Services. If appropriate the Service name(s) can be modified by selecting the 'Options for generated Service name' tick box and modifying the entries. Finally click the 'Generate' button
The requested Services and Service definition files (DataView(s) and XSD(s)) have been added to your server configuration or, if not, a suitable error message will indicate the cause of failure.
Specify the ODBC Dsn to be browsed. Optionally enter a 'Pattern' limiting the operation, for example 'uspGet%' will return a list of stored procedures starting with 'uspGet'. Optionally specify 'Max. entries to list' to further limit the number of stored procedures to be listed. Click the 'Discover' button.
Start Discovery by right-clicking the Services element on the server you want the DataView(s) to be created, select the Discover Service(s) context function
Select <SYSOBJH> from the 'Select the Source' list and then select the ' Use Driver' button.
Select the SYSOBJH file to be used as the input to the creation process, specify if XSD(s) are to be created for the generated Service(s) as well, in addition to the DataView(s).
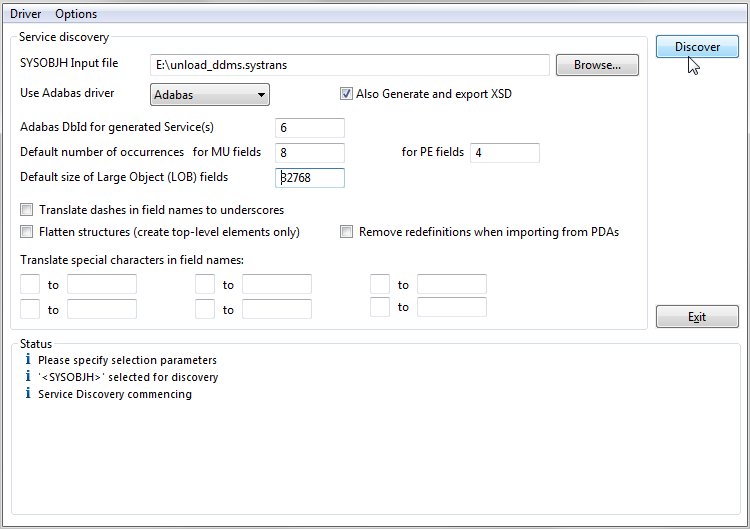
A number of options can be specified here
defaults to be used when generating Service(s) and DataView(s) based on Adabas files
Select the DDM(s) to be turned into Services, click the 'Generate >' button
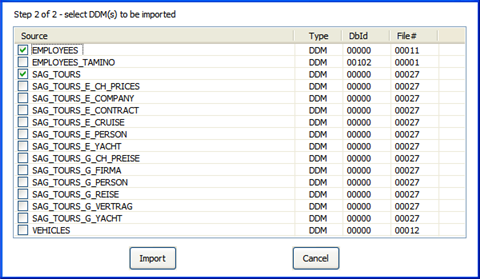
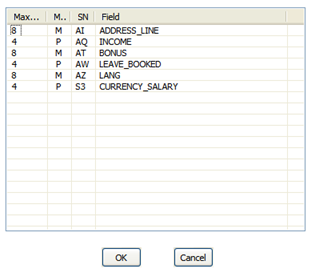
For each DDM selected, which contains MU and or PE fields, a dialog will request you to specify the maximum number of occurrences expected.
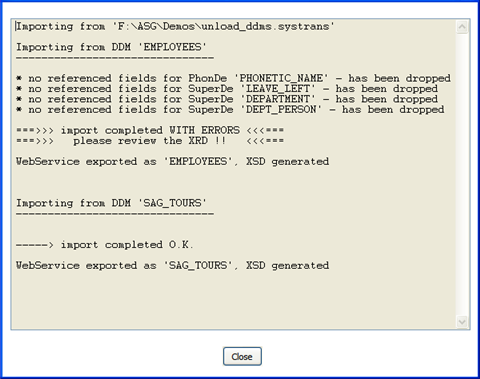
The status pane indicates what has been generated, you can now start the process again or exit the wizard.
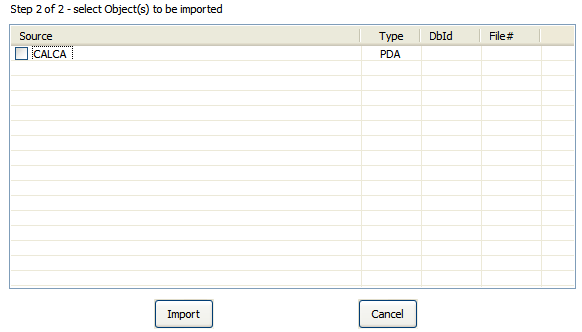
In case of a Natural Parameter Data Area (PDA), the type will be shown as "PDA"
Specify the name of the Library to be scanned, select if it is a Natural "User" or a "System" library.
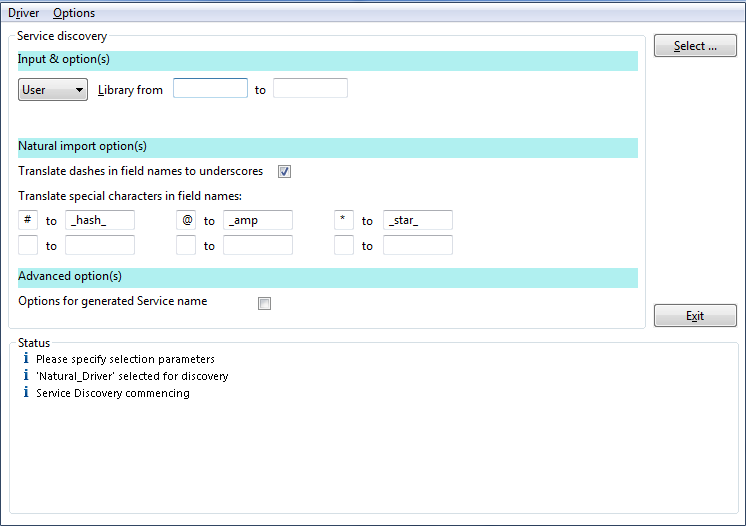
Alternatively, if the library name is unknown, specify a generic library name, or a from-to range and click the Select... button. For example, the above input will result in this additional selection dialog to pop up
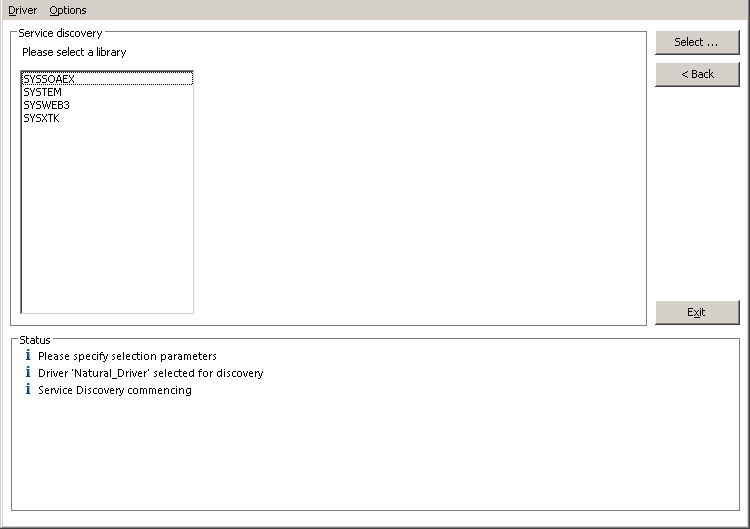
Select a library with a double-click, or select a library name and click Select, or stop the wizard by clicking the Exit button.
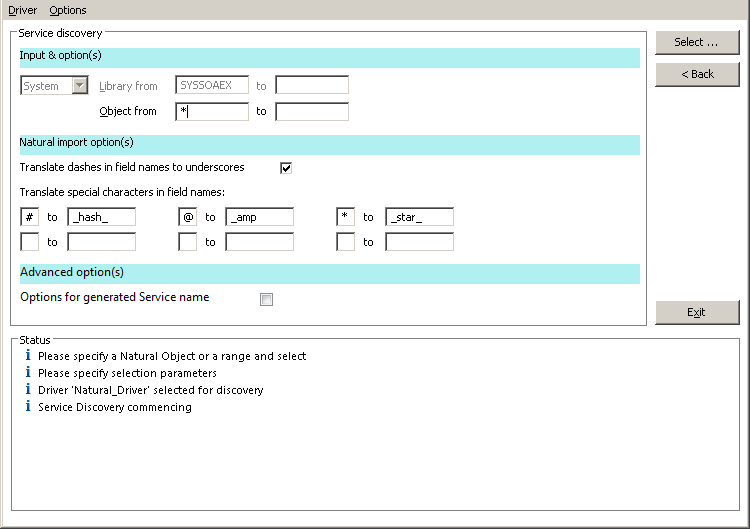
Select the name(s) of the object(s) to be turned into Services, click the Select... button. Again, this can be a specific object name, a generic object name, or a range of objects. When a specific object name is entered in the Object "from" field, but the "to" Object name field is left empty, this will result in all objects starting from the specified name being listed
You may return to Library selection mode by clicking the Back button.
A list of objects matching the selection criteria is displayed
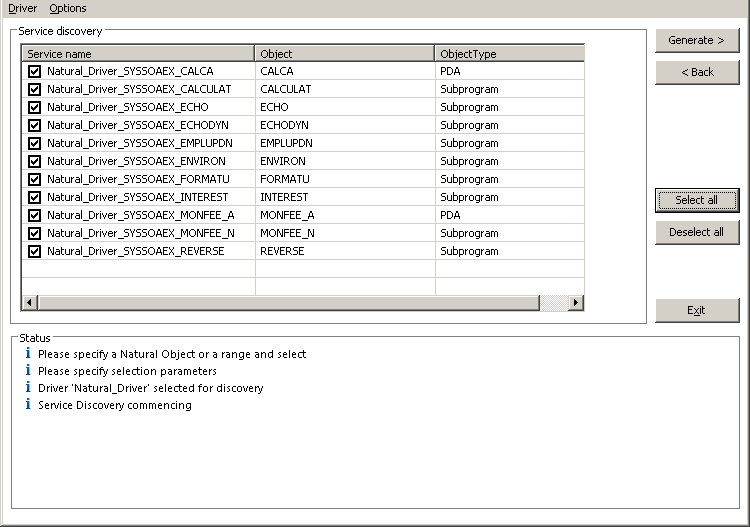
Either select all, or only the one(s) you are specifically interested in, click the Generate button.
The Status pane will report on the progress of each item chosen.
The requested Services and Service definition files (DataView(s) and XSD(s)) have been added to your server configuration
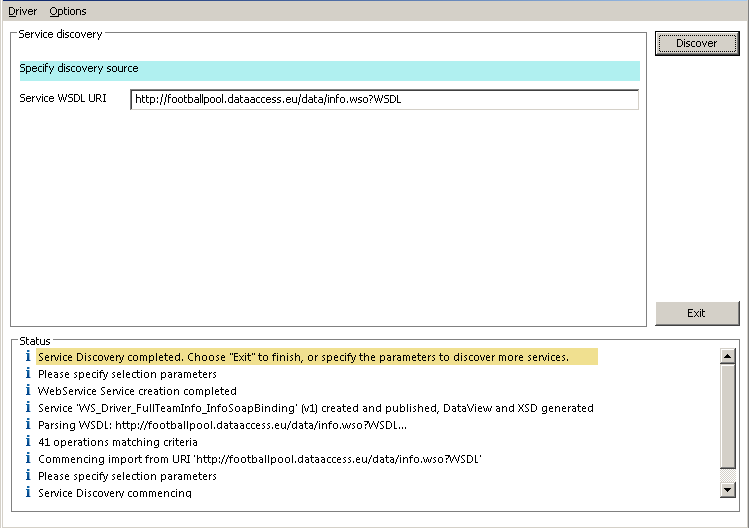
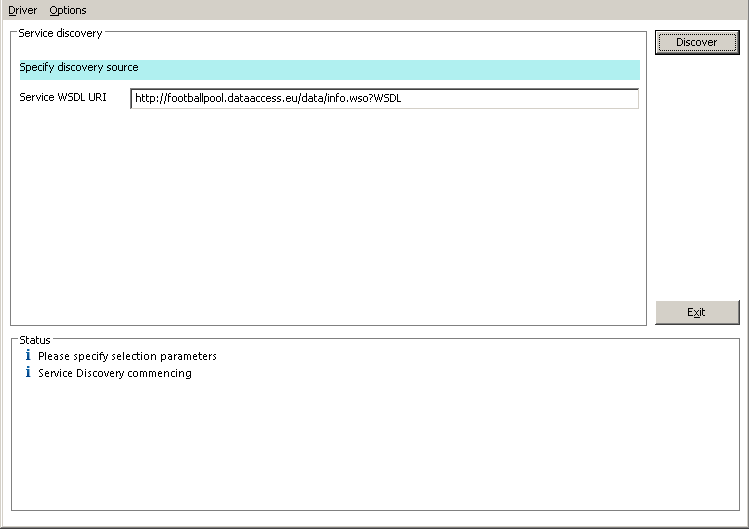
Specify the Web Service URI and click the 'Discover' button
The Status section will display the progress of each stage of the web service discovery and the Service discovery section will display the following information retrieved from the service description
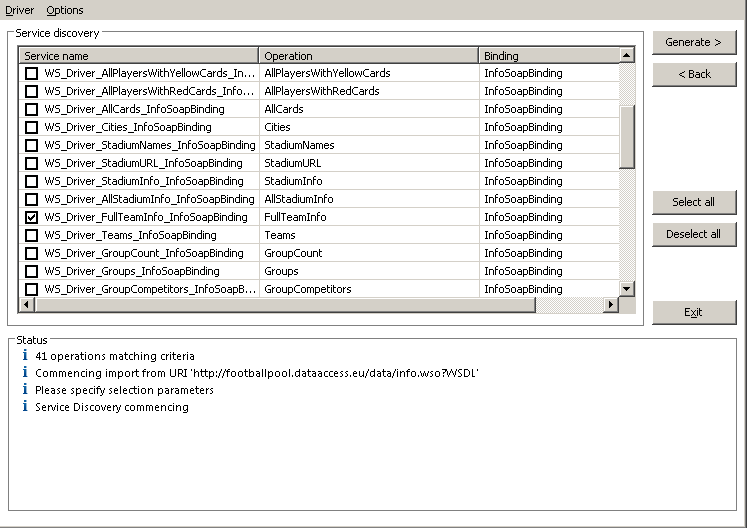
Use Select all to choose all operations or select on an individual basis. When chosen click the Generate > button.
The Status section will be updated with the progress of the generation process, listing the operations selected and the results for each one. For clarity we have chosen the TopGoalScorers operation.